

Appearance
🎬 Video Capture Techniques for E-commerce 3D Models
With your product, scene, and camera ready, let's capture that footage! How you move your camera (or rotate your product) is super important for a quality 3D model. The goal: show our software your product from all key angles.
⭐ Golden Rules for Product Capture
No matter your method, remember these for e-commerce success:
| Rule | Description |
|---|---|
| 🌟 Smooth & Steady | Avoid jerky or rushed movements. Think slow, deliberate, and smooth to prevent blur |
| 📐 Overlap is Key | Each new view should overlap the last by about 60-70%. Imagine painting a wall – you overlap strokes for even coverage! |
| 🎯 Product is the Star | Keep your product centered and filling a good part of the frame. Don't cut off edges! |
| 💡 Stay Consistent | Don't change lighting, lens or camera exposure settings mid-shoot for one product |
🚶 Method 1: The 360° Walk-Around (Handheld Camera)
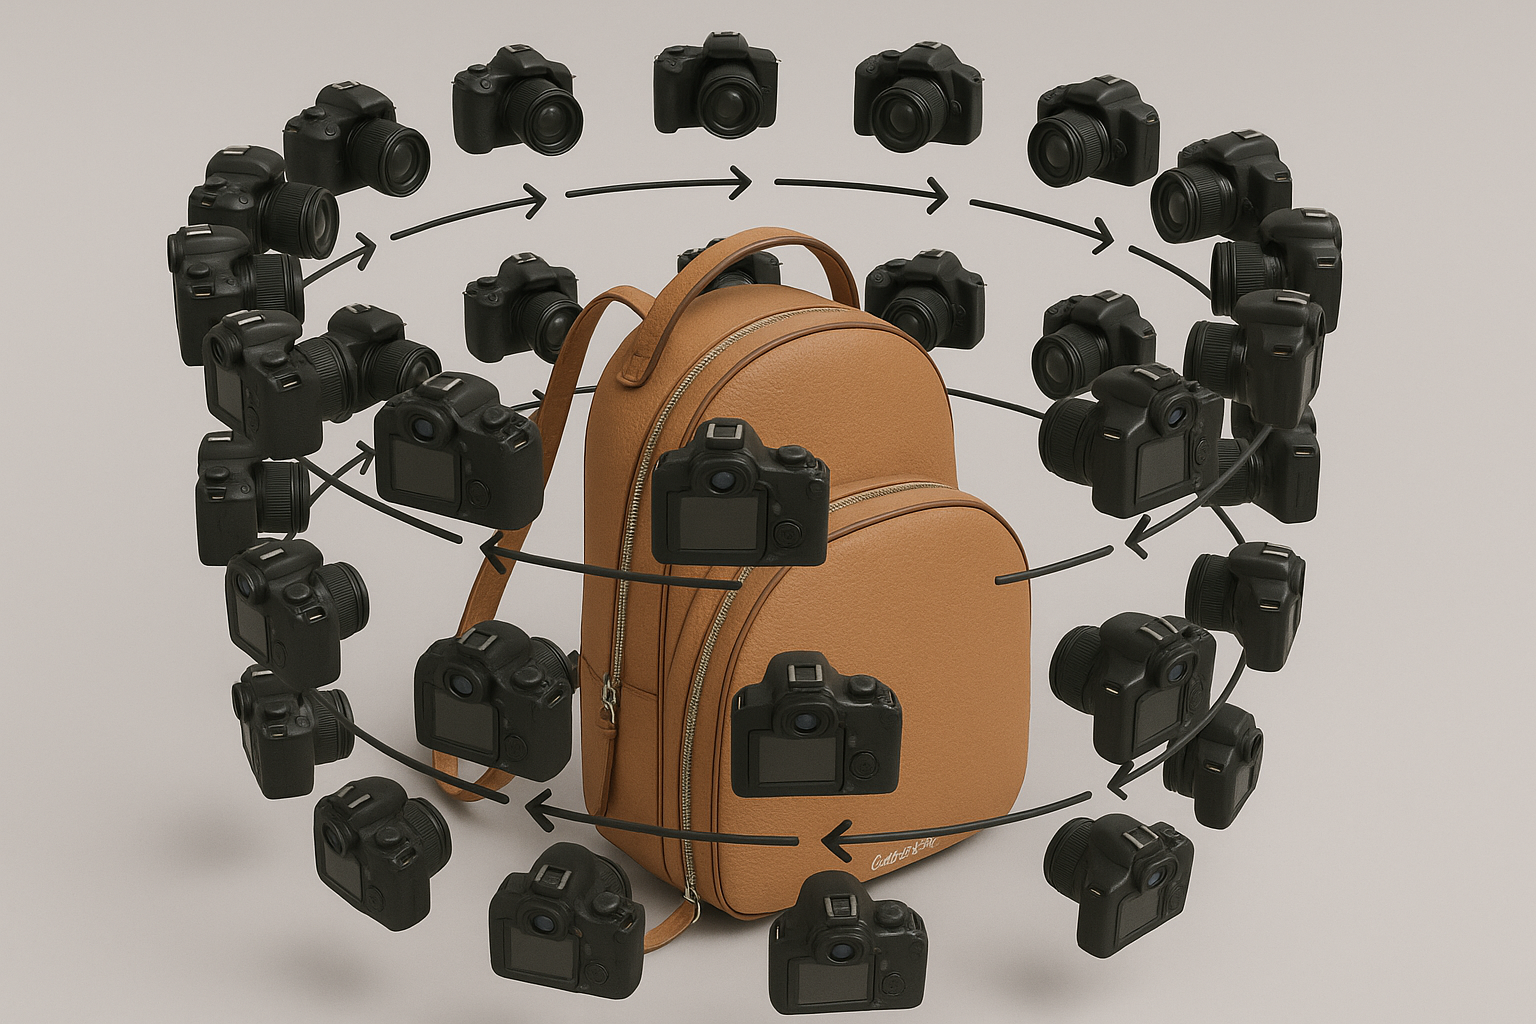
Good for any product but particularly larger products you can't easily put on a turntable and especially reflective, plain or transparent objects. You (the camera) will move around the stationary product.
Best for: Small furniture, larger electronics, decor items, reflective or textureless objects
👟 Steps for the "Orbital Path"
Plan Your Route
- Clear a path around your product for smooth movement
Loop 1 (Product Lower Angle)
- Start recording
- Angle slightly up
- Maintain a consistent distance
Loop 2 (Middle Angle)
- Change camera height (go higher)
- Circle the product slowly, keeping it centered
- Keep object in frame
Loop 3 (Higher Angle)
- Raise camera height
- Angle slightly down
- Circle again
Optional: More Loops/Details
- For complex items, add another loop
- Sometimes 4-5 loops give better result
Optional: More Details
- For complex items, get closer in even if object is not fully in frame
- The other loops will inform the algorithm
- Maintain overlap
Why Multiple Orbits?
Different heights and angles create parallax (slight shifts in how features appear). This is vital for our software to "understand" the product's 3D shape accurately.
🔄 Method 2: The Turntable (Rotating Product)
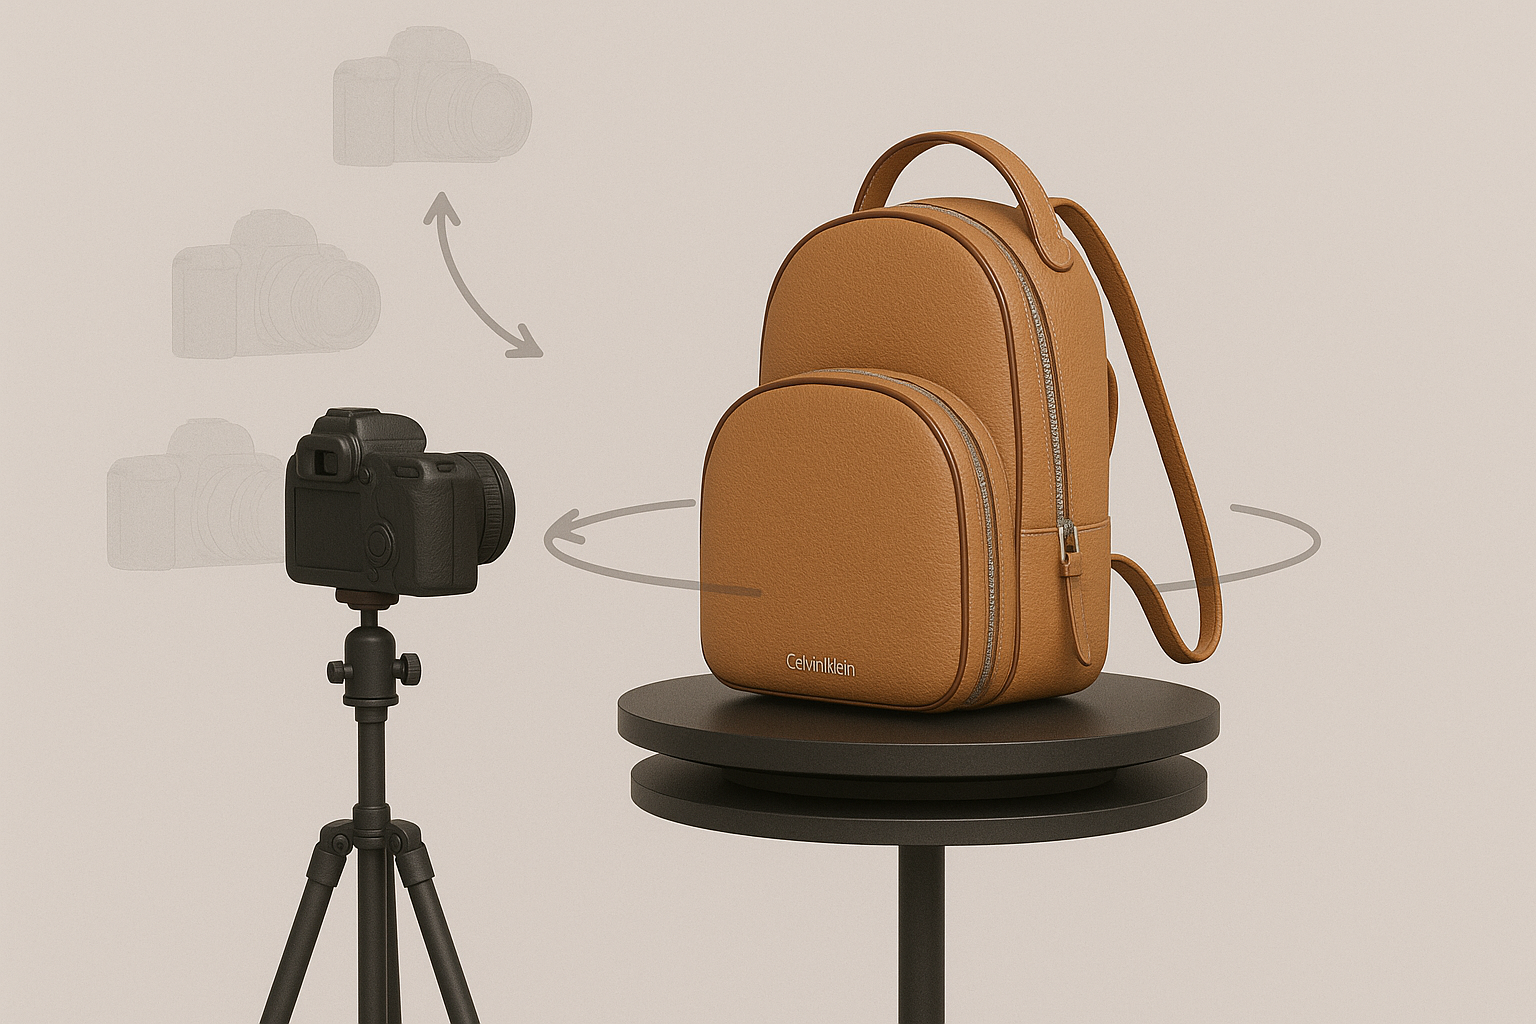
Perfect for smaller to medium products, products that you might want to turn over to capture all sides. The product rotates; the camera stays (mostly) still. Often gives very consistent results for e-commerce.
Best for: Shoes, accessories, electronics, packaged goods.
Avoid this method for shiny, transparent or featureless objects
⚙️ Setting Up Your Turntable
| Component | Details |
|---|---|
| Turntable | Any smooth, stable rotating platform works |
| Lightbox | Highly recommended! Provides even, diffuse light for clean, professional product shots |
| Tripod | Use one for your camera! Maximum stability = sharp, consistent frames |
How to Scan with a Turntable
Camera Position 1 (Straight-On)
- Mount camera on tripod
- Frame product
- Start recording
- Rotate turntable slowly and smoothly for 1 full 360° turn
Camera Position 2 (Higher Angle)
- Stop recording
- Raise camera, angle slightly down
- Re-check focus/framing
- Start recording
- Rotate product again (1 turn)
Camera Position 3 (Lower Angle - if needed)
- Repeat process
- Move camera lower, angling up
Capture the Base (Very Important!)
- Stop recording
- Carefully flip/reposition product on its side or upside down (if stable)
- Adjust camera if needed
- Record 1 more full rotation from at least two heights
Video Capture Tip!
For turntable video, a very slow, continuous rotation is best. If capturing still images with a turntable.
Capturing Stills
Turntable scans can be done as seuqences of still images instead of video if the camera and turntable control allow it. Try to capture avery 6-10 degrees of the object within a 360 loop.
Patience and precision during capture are your best friends for amazing 3D product models!